Run for the border, eh! The Daring Bakers head north to Nanaimo

The January 2010 Daring Bakers’ challenge was hosted by Lauren of Celiac Teen. Lauren chose Gluten-Free Graham Wafers and Nanaimo Bars as the challenge for the month. The sources she based her recipe on are 101 Cookbooks and www.nanaimo.ca.

Shut up, you hoser!

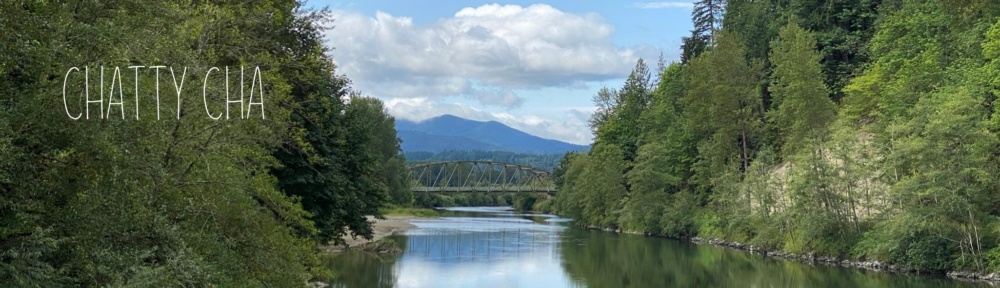
Lauren’s choice is fitting, considering the imminent 2010 Olympics, hosted in beautiful Vancouver, B.C., just few hundred miles away from my home in Seattle. Am I going to be anywhere near there in February? Heck, no. But I will be watching the coverage down here, and what better local treat to enjoy than these wonderful chocolatey layer bars. For those of you unaware, Nanaimo is a city located on Vancouver Island in the province of British Columbia.

And there is some great history on behind the Nanaimo Bar. If I may quote the always-accurate Wikipedia:

The bar originated in Ladysmith south of Nanaimo in the early 1950s. A local housewife from Cowichan Bay, by the name of Mabel Jenkins, submitted the recipe to the annual Ladysmith and Cowichan Womens Institute Cookbook. This cookbook was sold in the early 1950s in the region as a fundraiser. It made its way throughout the province’s communities by way of household cookery recipes shared by housewives in the 1950s, particularly via company towns. It was sold in many of the coffee shops on Nanaimo’s Commercial Street, and soon became popular. Tourists in the region, especially US tourists on pleasure boats came to refer to these as “Nanaimo Bars”.

But before we get ahead of ourselves, let’s begin with the basics of Lauren’s challenge, namely, the homemade graham wafer (or as we ridiculous Americans like to call graham crackers). Seems to make sense now, until this challenge I did not know this is a North American treat. Loved hearing about the experiences of my global daring baker neighbors who have never seen or heard of a graham cracker, something I’ve taken for granted all my life.

Baking them was fun and simple. Reminded me why I enjoy baking. While Celiac Teen impressed upon us to try the gluten-free version, I opted for the gluten-ful version for cost reasons. I did look for the gluten-free ingredients and was surprised that the local natural foods store did not have all of the flours available in their bulk section, and not even all of them in the packaged section (Really, View Ridge PCC? I am shocked). Total costs of buying the flours packaged was over $15 at Whole Foods and since I had all of the gluten-ful ingredients at home anyway, I made the decision to go gluten.

I didn’t expect the cracker to be so simple to make. I love this recipe because it’s so natural. Most commercially-made graham crackers contain high-fructose corn syrup, something this family strives to avoid. Mine were a little softer than the grocery-store kind, but I kind of like them chewy that way. Works for me.

I must say the dough smelled terrific. Just like honey graham crackers! I loved making that dough. With fair warning from fellow DBs that it was sticky, I was well-prepared. I baked these Saturday, with the plan to make the Nanaimo Bars on Sunday, using crackers that came out a little bit more crunchy.

graham crackers

On Sunday, the husband took the babe with him to his parents and I was given a few hours to myself, some of which I thought I would spend on the bars. Not all of the 5 or so hours, just some. To my surprise, the simple recipe became a decidedly challenging one for me. First, I couldn’t find my square baking pan. I asked the husband who denies knowing its whereabouts. If I find my Calphalon pan under a sink catching a leaky pipe somewhere there will be heck to pay. Though this didn’t really slow me down. No problem, I thought. I’ll be creative and use my silicone muffin pan. That was challenge #1.

Challenge #2 was my desire to reduce the rich/sweetness, especially of the middle icing layer, which was basically icing sugar and butter. Other DBs declared this a decadent treat. My attempt to test a way to reduce the richness of that icing layer turned into a debacle. I got the math wrong or something, and my icing layer would not thicken. And it was lumpy. I hate lumpy. I was very close to throwing my Kitchen-Aid mixer out the window when instead I just left the house. Took a walk. Who knew making a layered bar would be so frustrating. When I returned I decided to turn that middle layer into a vanilla pudding layer and suddenly things looked up.

Because of the consistency of the pudding (kinda soft), I threw the pan into the freezer. My bars became a really great frozen treat. The layers themselves are not has thick as the typical bar, however in an effort to reduce the richness of it, I think I succeeded. I wouldn’t call these “light” by any means (a cup of butter by any other name is still a cup of butter), but definitely a great version for those not into the sweet-sweet treats.

For the bottom layer I traded the ground almonds for pecans, then sprinkled some of those pecans on top. The top layer is your basic semi-sweet chocolate. Yum.

In hindsight, a lot of fun. As always, very thankful for even a few hours of alone time between the kitchen and me, even if we fight a little. You gotta have a little passion in the relationship, right.

Jump for the recipes, download the PDF or visit TheDaringKitchen.com for recipes plus additional baking tips.

Continue reading

Tis the Season to Make a Gingerbread House


The December 2009 Daring Bakers’ challenge was brought to you by Anna of Very Small Anna and Y of Lemonpi. They chose to challenge Daring Bakers’ everywhere to bake and assemble a gingerbread house from scratch. They chose recipes from Good Housekeeping and from The Great Scandinavian Baking Book as the challenge recipes.

In the Daring Baker Hosts’ words:

“Anna: The recipe I tested is from Good Housekeeping – I chose it because it was simple and required only ingredients I personally always have in my kitchen. Plus, it was so funky I HAD to try it, and luckily that worked out. I made my house around Halloween and decided to take advantage of the spooky goodies I could only get at that time of year.”

“Y: I tested a Scandinavian recipe from The Great Scandinavian Baking Book. I chose a Beatrice Ojakangas’ recipe because I love her book, and usually have great success with her recipes. I was also attracted to the ingredients she had in her gingerbread. If you’re using this recipe, please be aware that in general, gingerbread for houses is usually designed less for taste and more for its ability to be sturdy and long lasting.”

To see photos and get tips and notes on baking a gingerbread house, and to see our requirements for this challenge, visit TheDaringKitchen.com.

This was quite the fun project! I used the recipe Anna tested from Good Housekeeping. It called for 9 ½ (yes 9) cups of flour. That tipped me off that I was making a lot of dough, but didn’t know how much until it was too late. For the future, if you are planning to make a smaller house, you are probably safe to half that recipe. I made one small house and millions of cookies afterwards.

When I first brainstormed ideas for what type of house to build, I did in fact consider creating a Twilight-inspired design(you can read my Twilight-obsessed post here). After searching on the Web did I find out that someone out there already created one (scroll down towards the end)! For reals? Yes! So of course I couldn’t repeat it. Not only that, I don’t really have the skills to do it anyway.

I settled on a simple template that I found on Gingerbreadbydesign.com. It was the “Elf House Template” and featured a steep roof and cute chimney and seemed something I could tackle. While some fellow bakers reported shrinkage with these recipes, I experienced the opposite. My chimney grew so large after baking that I was unable to use it. It was nearly as tall as the house and I waiting too long to try to trim the pieces (once the baked cookie cools, you can’t trim without breaking the entire piece).

No worries. I kept the decoration simple. Spice drops, candy canes and some sprinkles I had from last year’s cookie extravaganza were the main décor. I also used the smaller cookies that I baked as decoration as well (note the snowflake on the house as well as the stars on the roof). In addition to the Christmas trees outside, I also had a little Gingerbread family: Dad, Mom and little girl. Unfortunately I ran out of space and time and so ultimately ate them!

As the glue to keep everything together I used the “Ornamental Frosting” recipe from Good Housekeeping. It was a standard confectioner’s sugar + water + egg powder concoction that tasted terrible. Worse yet, the second batch I made was not as gluey as my first batch, which would come back to bite me in the butt later on. When I made a third batch of frosting, to frost the cookies I eventually took to work (did I mention I made a gazillion cookies with my leftover dough?), I added butter and vanilla and it was much much better.

I finished this “masterpiece” at around eleven at night. I would have preferred to wait until daylight to take a better picture. However, by the next day my roof had toppled over (shoddy craftsmanship?? by the Chinese?? Oh no!).  I was relieved that I thought to take pics that evening. But as a result the lighting is a bit much and the white coconut snow you see there is hidden behind the glare of the lights and aluminum foil I placed everything on.

As I usually am when I first read what the Daring Baker Challenge is going to be, I was a little bit intimidated by the thought of making a house from scratch. But, as usual, I had nothing to fear. The dough was a cinch to make, and I have visions of turning this into a new tradition at my home. By next Christmas I think little Lily will be old enough to help decorate her own little house and we can build our own little village!

Plus, this was far fancier than the graham cracker shack I made at my sister’s a few years ago:

Anna’s Recipe (via Good Housekeeping)

2 1/2 cups (500g) packed dark brown sugar
1 1/2 cups (360mL) heavy cream or whipping cream
1 1/4 cups (425g) molasses
9 1/2 cups (1663g) all-purpose flour
2 tablespoon(s) baking soda
1 tablespoon(s) ground ginger

1. In very large bowl, with wire whisk (or with an electric mixer), beat brown sugar, cream, and molasses until sugar lumps dissolve and mixture is smooth. In medium bowl, combine flour, baking soda, and ginger. With spoon, stir flour mixture into cream mixture in 3 additions until dough is too stiff to stir, then knead with hands until flour is incorporated and dough is smooth.

2. Divide dough into 4 equal portions; flatten each into a disk to speed chilling. Wrap each disk well with plastic wrap and refrigerate at least 4 hours or overnight, until dough is firm enough to roll.

3. Grease and flour large cookie sheets (17-inch by 14-inch/43x36cm)

4. Roll out dough, 1 disk at a time on each cookie sheet to about 3/16-inch thickness. (Placing 3/16-inch dowels or rulers on either side of dough to use as a guide will help roll dough to uniform thickness.)

5. Trim excess dough from cookie sheet; wrap and reserve in refrigerator. Chill rolled dough on cookie sheet in refrigerator or freezer at least 10 minutes or until firm enough to cut easily.

6. Preheat oven to 300 degrees F (149C)

7. Use chilled rolled dough, floured poster board patterns, and sharp paring knife to cut all house pieces on cookie sheet, making sure to leave at least 1 1/4 inches between pieces because dough will expand slightly during baking. Wrap and reserve trimmings in refrigerator. Combine and use trimmings as necessary to complete house and other decorative pieces. Cut and bake large pieces and small pieces separately.

8. Chill for 10 minutes before baking if the dough seems really soft after you cut it. This will discourage too much spreading/warping of the shapes you cut.

9. Bake 25 to 30 minutes, until pieces are firm to the touch. Do not overbake; pieces will be too crisp to trim to proper size.

Ornamental Frosting (via Good Housekeeping)

1 package(s) (16-ounce) confectioners’ sugar
3 tablespoon(s) meringue powder, (see note below)
Assorted food colorings (optional)
1) In bowl, with mixer at medium speed, beat confectioners’ sugar, meringue powder, and 1/3 cup warm water until blended and mixture is so stiff that knife drawn through it leaves a clean-cut path, about 5 minutes.

2) If you like, tint frosting with food colorings as desired; keep covered with plastic wrap to prevent drying out. With small spatula, artist’s paintbrushes, or decorating bags with small writing tips, decorate cookies with frosting. (You may need to thin frosting with a little warm water to obtain the right spreading or piping consistency.)

Merry Christmas!

Leave the gun. Take the cannoli.

Daring Bakers November Challenge

Daring Bakers November Challenge

The November 2009 Daring Bakers Challenge was chosen and hosted by Lisa Michele of Parsley, Sage, Desserts and Line Drives. She chose the Italian Pastry, Cannolo (Cannoli is plural), using the cookbooks Lidia’s Italian-American Kitchen by Lidia Matticchio Bastianich and The Sopranos Family Cookbook by Allen Rucker; recipes by Michelle Scicolone, as ingredient/direction guides. She added her own modifications/changes, so the recipe is not 100% verbatim from either book.

Cannoli are known as Italian-American pastries, although the origin of cannoli dates back to Sicily, specifically Palermo, where it was prepared during Carnevale season, and according to lore, as a symbol of fertility. The cannoli is a fried, tube-shaped pastry shell (usually containing wine) filled with a creamy amalgamation of sweetened ricotta cheese, chocolate, candied fruit or zest, and sometimes nuts. Although not traditional, mascarpone cheese is also widely used, and in fact, makes for an even creamier filling when substituted for part of the ricotta, or by itself. However, cannoli can also be filled with pastry creams, mousses, whipped cream, ice cream etc. You could also add your choice of herbs, zests or spices to the dough, if desired. Marsala is the traditional wine used in cannoli dough, but any red or white wine will work fine, as it’s not only added for flavor or color, but to relax the gluten in the dough since it can be a stiff dough to work with. By the way, the name ‘Lidisano’ is a combination of Lidia, Lisa and Sopranos.

Download a PDF of Lisa Michele’s recipe and instructions or visit TheDaringKitchen.com.

Fact: Cannoli is the plural form of the dessert, cannolo

Fact: Cannoli is the plural form of the dessert, cannolo

As for my results … I’m pretty pleased with them. Unlike the two other challenges I’ve done, this is the first time I feel like I actually accomplished what I set out to do. 1) Crispy, blistery shell. 2) Traditional, sweet-but-not-too-sweet filling. I followed the TDB (The Daring Bakers) recipe exactly, and the hints and tips which Lisa set out for us were right on. The dough was very stiff. Keep working it, Lisa told us, eventually it will give. And it did. I let the dough sit for quite a while (at least six hours), and let the ricotta drain for about 24-hours. Both helped a great deal, I think. The deep-fried shells were light and crispy. The tiny bit of cocoa and Marsala wine added a nice, complex flavor.

We enjoyed these as a Thanksgiving treat. I’m quite pleased that they turned out so well. I received compliments and a request for the recipe, as well as a declaration from the MIL that she would also try to make them. While I saw many of my fellow Daring Bakers go for nontraditional fillings, considering my in-laws’ Italian heritage I decided to go as traditional as possible. The filling includes ricotta cheese, confectioner’s sugar, cinnamon, vanilla, orange zest, mini chocolate chips and chopped pistachios. Maybe the big change was using part-skim ricotta cheese rather than the full fat!

As with every challenge thus far, this one did terrify me at first. Mainly because of the frying. I am not a fryer. It’s not in my blood to cook something in three inches of oil. I considered baking the shells instead. However, as part of my research into cannoli, I tasted one from DeLaurenti’s at Pike Place Market. After the first bite of possibly the best cannolo in town, I immediately knew that making the shells properly, in the fryer, was the only way to go.

Two questions I have for you. 1) What does one do with frying oil when one is done? and 2) Can you find me a cannolo better than the one I tasted at DeLaurenti’s?

Special thanks to my MIL, the cook of all cooks, for buying me cannoli forms! No need to hack something together, which I’m often prone to do.

P.S. For any of you who don’t know where the title of this post comes from … Shame on you. It is from one of the greatest movies ever made.

French Macaron: 1 ChattyCha: 0

Macaron

Macaron, sorta

The 2009 October Daring Bakers’ challenge was brought to us by Ami S. She chose macarons from Claudia Fleming’s The Last Course: The Desserts of Gramercy Tavern as the challenge recipe.

THE DARING COOKS OCTOBER 2009 CHALLENGE: MACAROONS

Introduction: Unless you’ve been frozen in permafrost for the past five years, you’ve likely noticed that cupcake bakeries have popped up all over like iced mushrooms. Knock one down, and three take its place. Much has been made about not only the cupcake’s popularity, but also its incipient demise as the sweet du jour. Since we seem to be a culture intent on the next sensation, pundits, food enthusiasts and bloggers have all wondered what this sensation might be. More than a few have suggested that French-style macaroons (called macarons in France) might supplant the cupcake. This may or may not come to pass, but the basic premise of the French macaroon is pretty damned tasty.

In the United States, the term “macaroon” generally refers to a cookie made primarily of coconut. But European macaroons are based on either ground almonds or almond paste, combined with sugar and egg whites. The texture can run from chewy, crunchy or a combination of the two. Frequently, two macaroons are sandwiched together with ganache, buttercream or jam, which can cause the cookies to become more chewy. The flavor possibilities and combinations are nigh endless, allowing infinitely customizable permutations.

For more details on the challenge set forth on the Daring Bakers, visit TheDaringKitchen.com

As for my experience … well it’s definitely a building season for me. I am impressed with the luxury that many of my fellow bakers have with testing and re-testing their cookies. Sadly, I had one day. Not so sad, though. The babe and I visited the in-laws and made it a day of playing with baby and baking. My mother-in-law not only had fun with her granddaughter but was an excellent sous chef (does a baker have a sous chef?).

Alas, my macarons did not turn out as they are supposed to. Example:

Exhibit B

Exhibit B

Tasty? Yes. Chewy texture? Sure. Delicious chocolate ganache filling? Absolutely. However, this batch is missing two very distinctive parts of the true French Macaroon cookie: A. The “feet” and B. The smooth, almost shiny texture on the cookie. I have neither. So, in essence this was a failure. A delicious failure, but a failure nonetheless.

I will attempt again, I just can’t find the time before “reveal” date, but I’m fairly sure I know what I did wrong: overfolding the eggs. Also, as time was of the essence, I wonder if I had let the batter sit for a little bit before piping if that might have helped with adding volume.

Ultimately, the cookies were good, and none went to waste. I am truly impressed with the talent that surrounds me at the Daring Bakers. More importantly, I’m impressed with the support that everyone receives from each other. What a great community. Feel the love.

By the way, if you are curious to know what a French Macaroon should actually look like, either visit TDK or see the pic I took last year when I got these in San Jose’s Santana Row while hanging with my buddies Belinda and Sandy.

Macaron, for real

Macaron, for real

The Daring Bakers September Challenge (or, Do you have the onions?)

Yeah, sure I work full-time and have an 8-month old baby. But why should that stop me from trying something a little … daring?

This month I joined the esteemed Daring Kitchen, and September marked my first challenge. Quick background … bakers and chefs from around the world all cook or bake a secret recipe. On the 27th of the month, the Bakers reveal their challenges to the Interwebs via blogs and the DK Web site.

The September 2009 Daring Bakers’ challenge was hosted by Steph of A Whisk and a Spoon. She chose the French treat, Vols-au-Vent based on the Puff Pastry recipe by Michel Richard from the cookbook Baking With Julia by Dorie Greenspan.

Daring Bakers Challenge: Vol-au-vents

Daring Bakers Challenge: Vols-au-Vent

I was a little nervous trying this new challenge, as I simply don’t have the kind of time I used to, to do fun projects like this. Turns out Vols-au-vent was a perfect “rookie” challenge to start with. There is a lot of chilling and waiting and resting required, as the main ingredients in the homemade puff pastry are butter and flour, and the butter must be kept cold for this to work.

To take from the Daring Baker who challenged us to make homemade puff pastry, “Puff pastry is in the ‘laminated dough’ family, along with Danish dough and croissant dough. A laminated dough consists of a large block of butter (called the “beurrage”) that is enclosed in dough (called the “détrempe”). This dough/butter packet is called a “paton,” and is rolled and folded repeatedly (a process known as “turning”) to create the crisp, flaky, parallel layers you see when baked. Unlike Danish or croissant however, puff pastry dough contains no yeast in the détrempe, and relies solely aeration to achieve its high rise. The turning process creates hundreds of layers of butter and dough, with air trapped between each one. In the hot oven, water in the dough and the melting butter creates steam, which expands in the trapped air pockets, forcing the pastry to rise.”

Impressive, no?

The gist of the challenge … make a dough. Beat the butter. Join the two. Cut out shapes. Stack and bake. Fill with tasty fillings. Voila. Pretty simple.

Yeah, right. I read and re-read the recipe a dozen times. I laid in bed the night before, planning the entire strategy in my head. Then, a few Saturdays ago, I was ready.

I had the babe in the Baby Bjorn with me while I made the flour/water dough. She was also with me when I beat a pound of butter nice and flat with a rolling pin. She loved it. I had her sitting in her exersaucer in the kitchen doorway while I “turned” the dough. I turned it some more while she napped. And again the next morning while she played on her tummy. The final baking occurred on Sunday during yet another nap. With plenty of pre-planning, my weekend of baking was actually quite fun and not stressful.

And my apologies to the husband, for getting flour all over the kitchen. 🙁

The above pastry contains a simple dill egg salad. The ones below some fresh whipped cream and strawberries. I can’t decide if I enjoyed the savory more or the sweet. Probably the sweet. But they were both quite fun and tasted amazing (we do not cook with so much butter, ever. What a treat). While Vols-au-vent are meant to be enjoyed immediately, even the next day the pastry tasted fine as well. Ask the husband. He ate a couple of pastry shells with no filling the next day while I was at work. I might have brought some to work to enjoy during the day as well.

Vols-au-vent with fresh whipped cream and strawberries

Vols-au-vent with fresh whipped cream and strawberries

I am surprised how much I enjoyed this, and, more importantly, how much easier it was than I thought it would be. Becoming a Daring Baker was terrifying to me, for some reason. Almost to the point where I wished I hadn’t signed up to do it. But when they took me in, I couldn’t disappoint. I’m glad I am doing this, if only to get me out of a general rut I’ve been feeling this year. Possibly connected with having a baby. I love my child, but I really need to have something outside the realm of being Mom and Employee. I used to be a rower. I am still a baker. Thanks, Daring Bakers, for giving me a chance to spread the wings. And the butter. Whoop!

I still shudder a little bit with fear when I think about next month’s challenge. But I know I’m going to do it. I may not rock it, but that’s not my goal right now.

By the way, the pastry shells in the above pics were four or so of the best ones. There were many that did not make the cut. Here’s a shot of “When Vols-au-vent Goes Bad”:

When bad things happen to good Vols-au-vent

When bad things happen to good Vols-au-vent

Centers puffed up. Sides were lopsided. Oh, and those are supposed to be CIRCLES … not ovals. Alas, they still tasted great. I am proud to say I have a stack of homemade puff pastry sitting in my freezer right now. Yum.